
By Yvonne Tune Card Art Kilcoole

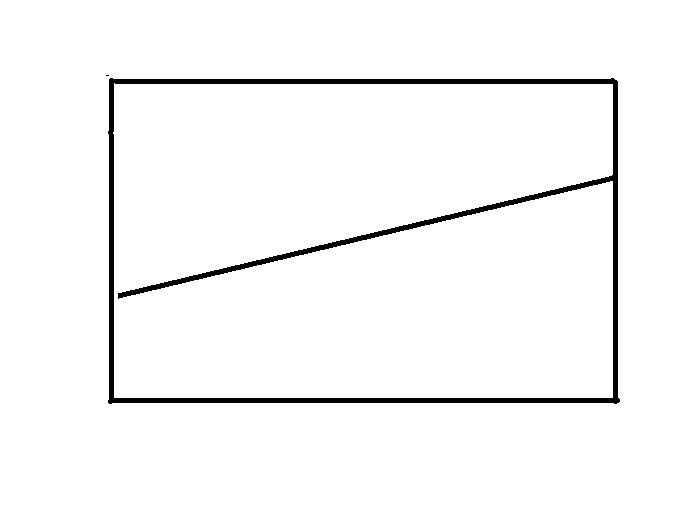
1. With a pencil Draw a Mark on a A4 sheet of card at the top at 7cm.
And on the opposite end mark the card at 14cm draw a diagonal line from the 7cm to the 14cm mark, as in picture below.
2. Cut the card through the line giving you 2 equal shapes
3. Score each panel of the card on the A4 half fold and on the A4 concertina fold, turn card and score it again on the A4 Concertina fold line. This will give you 4 equal width panels
4. To make the slots to form the cascade card, place the card at the straight edge on your score board, using your ruler, place the edge of ruler at the narrowest edge and mark the card at the two out side score lines.
On one card you need to cut through the scored line from the top to the mark,

And on the other card you need to cut through the scored line from the bottom to the mark,

Interweave the slots together and it will form this Shape.

To make your matting and layering panels
5. Repeat Step 1, on the pink card, when cut, you need to trim ½ cm from the straight edge, and cut 4 x 6 ½ cm panels, starting with the Smallest end, otherwise the panels will be to Big
6. Repeat step 1, on the piece of printed paper and cut 1cm from the straight edge, and cut 4 x 6cm panels. starting with the Smallest end, otherwise the panels will be to Big.
7. Matt and layer all panels (remember you have right and left hand panels) using glue, stick panels to the cascade card. TOP TIP Arrange all the panels flat on the table before you start sticking then to the main card. So that you know where to to stick the panels. Mark the panels 1 to 4 in pencil while the card is interweaved.
8. I Decorate with the pink flowers and leaves on opposite panels added the pearls to the centre of the flowers, and lastly add the butterflies.
9. Stick a 15cm Sq card to the back of card to make it stronger, and to add an insert.
10. Add a greeting to the front
11. And your insert to the back card.
This card folds flat, and can fit in a 15cm Sq envelope,
To make a box for this size card,
Cut an A4 sheet of card 21cm Square, and score it on the second line of the box maker side of the crafters companion board. for the lid and the base,
Recipe for this card
1 x A4 sheet of cream card
1 x A4 sheet of pink card
2 x A4 sheets of printed paper, you need 2 sheets because you need a right and a left panel.
1 x 15cm Square card
flowers (wild orchid crafts)
butterflies (Martha Stewart Large Monarch Butterfly punch)
self adhesive pearls for centre of flowers.
Hope you enjoyed this tutorial.
let me know how you get on.
Yvonne xx
Your card is beautiful
ReplyDeletethanks for the explanation
Greetings Baukje
thank you Baukje
ReplyDeleteI get so few comments it lovely to hear from you, keep checking in for new tutorials
all the best Yvonne
Thanks your card looks great and thanks for the measurement. sue
ReplyDeleteThis may be a really dumb question, but what is an A4 card, I'm just getting into scrapbooking and card making but I'm not sure what that means. Thank you, great tutorial!!
ReplyDeleteHi Katie A4 card is 30cm by 21cm in measurement, the standard size for printer paper, when folded in half it becomes a C5 card, hope that helps
ReplyDeleteYvonne.
Thank you. That was very helpful.
DeleteYour card and instructions are brilliant,thank you.
ReplyDeleteI am going to make one tomorrow.Keep well.Rosie.x
thanks for this ...
ReplyDeleteI looks good and great
........keep updating
* We Help All new FreelanceR*
ReplyDeleteGreat tutorial. I will try this as soon as I can.
ReplyDeleteStunning card, thanks for sharing the tutorial with us, I'm now going to give this a go :)
ReplyDeletethank you for the great pattern
ReplyDeleteLOVED YOUR CARD...BUT HOW DO I FIGURED CENTIMETERS INTO US INCHES ?
ReplyDeleteWould it be possible for you to convert the measurements to inches? Pretty please. I love your card. Gorgeous
ReplyDelete